Tuesday, January 31, 2017

The Juiciest Chicken Burgers Ever


I know what you are thinking. Really? A chicken burger, Why? That's an abomination to the real hamburger. Well, you haven't tried these chicken burgers. My husband who considers himself a connoisseur of the burger thinks these might just be his favorite of all time. Want to know the secret? Shishito peppers.

A Shishito pepper has a grassy, citrus flavor with sweet and hot notes without being spicy. Only 1 in 10 peppers are spicy so it's a surprise if you get the spicy one. When I use these peppers, I taste each one before adding it to my recipe, but if you're feeling lucky, my friend, just throw them in and see what happens.


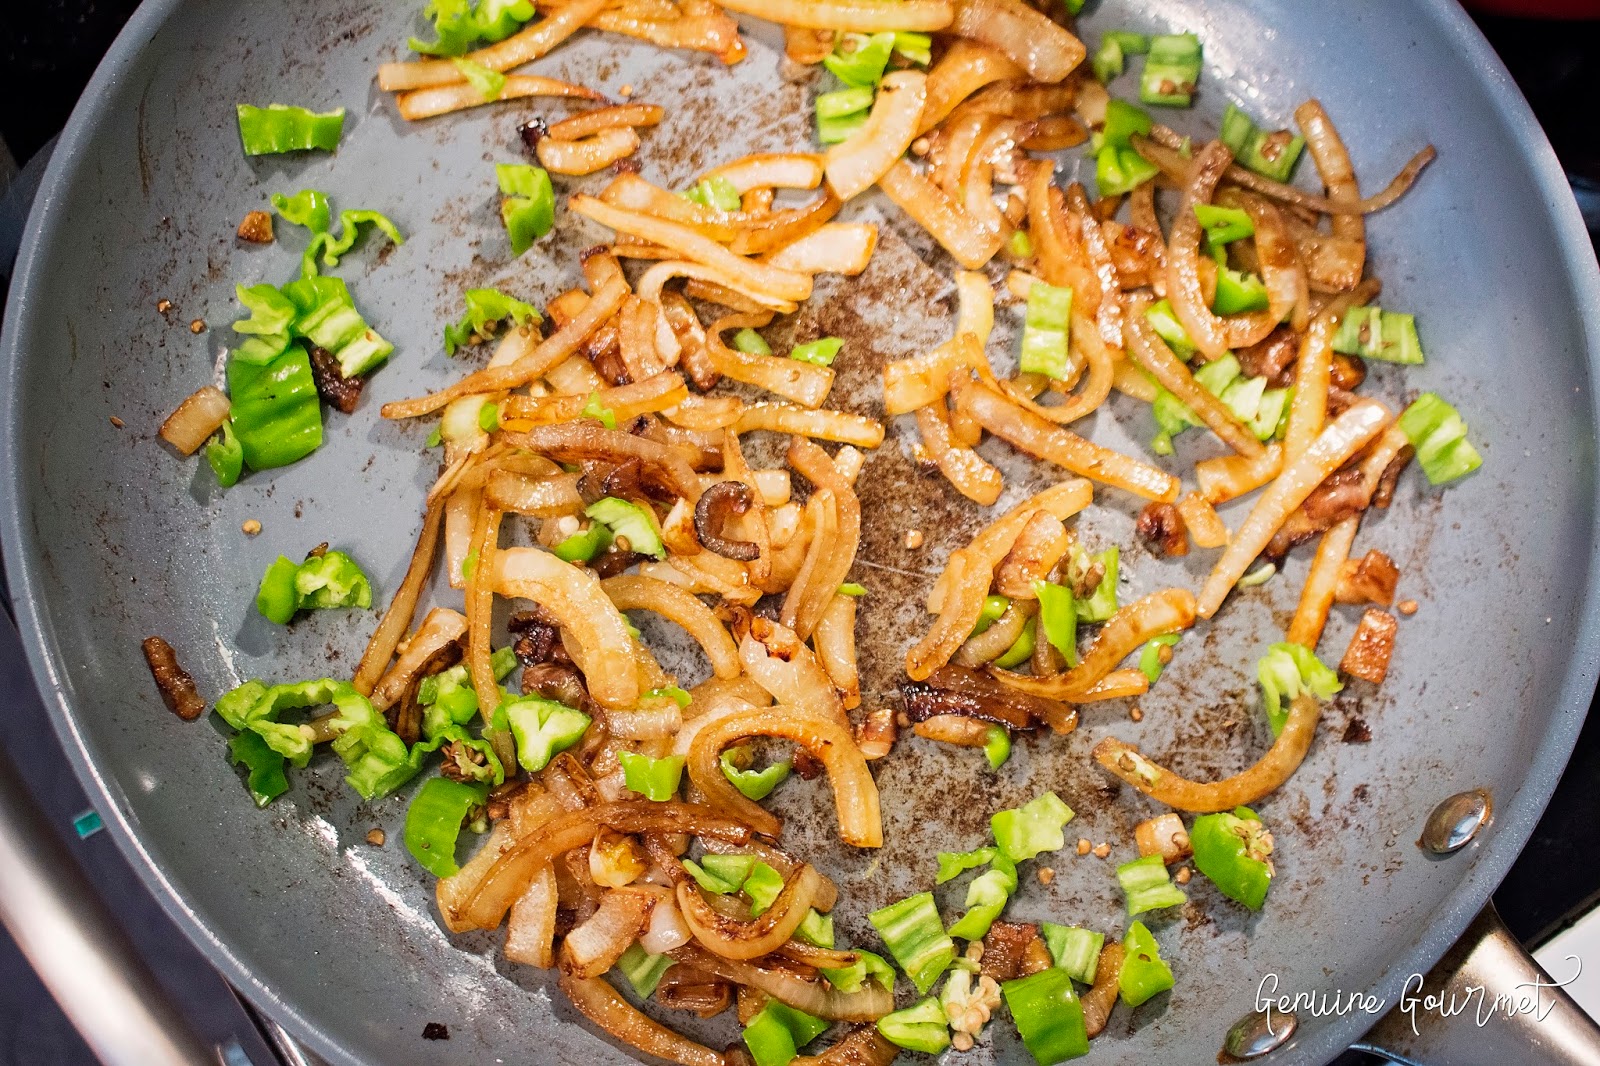
To start these burgers, caramelize one onion on medium low heat until a very deep golden brown. Take care not to burn the onions at the beginning, it will take about 30 minutes for the onions to slowly release their sugars and begin to brown. Once the onions have reached a dark, golden brown, turn up the heat to medium high and toss in the diced Shishito peppers. Cook for about 1 minute. Transfer onions and peppers to a heat proof cutting board and chop until very finely diced.

Allow onions and peppers to cool slightly. Place in a large mixing bowl with chopped green onions, chopped cilantro leaves, 1 teaspoon salt and 1/2 teaspoon black pepper. Mix until well combined.


Mix in the ground chicken and form into 1/2 pound patties. I like to place the patties on parchment paper because they can get a little sticky and it's one less dish to clean at the end of the meal. Oil both sides of the patty so they do not stick to the grill or grill pan. 


This cast iron grill pan is one of my favorite pans for under $50. The reverse side is a griddle so it awesome for pancakes, fried eggs and bacon.  I use this pan at least once a week since firing up the outside grill in the cold or rain is not my idea of easy cooking. 


Grill for 6 minutes on each side. Unlike beef burgers, these chicken burgers have to be cooked to well done. Test the center or each burger by gently pressing down with your finger. It should be firm to the touch, if it is still a little squishy, cook for another 2-3 minutes on medium low. Since we added the caramelized onions and peppers to the chicken patties, they should remain juicy even though they will be cooked to well done. 


To keep it healthy, serve with roasted baby carrots. Here's what you do: toss baby carrots with 1 Tbs. olive oil, 1/2 tsp fresh thyme leaves, and salt and pepper. Roast in a preheated 450 degree oven for 25 minutes, stirring once during cooking to prevent sticking. You won't miss the french fries, I promise. 

Amazing Chicken Burgers
Yeild: 8 half pound burgers
Ingredients:
1 onion, thinly sliced
8 Shishito peppers, chopped
4 Tbs. olive oil, divided
2 lbs. ground chicken (white and dark meat combined)
1 tsp. sea salt
2 green onions, thinly sliced
2 Tbs. cilantro leaves, finely chopped
1/2 tsp. black pepper

For serving:
8 hamburger buns
1 tomato sliced
1 avocado sliced
lettuce, mixed greens, etc. 

In a non-stick skillet on medium low heat, heat 1 Tbs. olive oil. Caramelize onions in pan for 30-40 minutes, stirring often to prevent burning. When onions are a deep, golden brown, turn heat to medium high and add Shishito peppers. Cook for 1-2 minutes or until peppers begin to blister slightly. Remove onions and peppers to a cutting board and chop very finely. Allow to cool slightly. Transfer onions and peppers to a large mixing bowl and mix in green onions, cilantro, salt and pepper. Mix in ground chicken and form into 1/2 pound patties. Oil both sides of patties before placing on the grill.

Grill on medium heat for 6 minutes each side, or until patties are well done. Serve on toasted hamburger buns with your favorite toppings. 

Monday, January 30, 2017

Roasted Root Vegetables


When root vegetables are roasted in a really hot oven, the sugars inside of them begin to caramelize and they become more delicious than ever before. This recipe is great because you can use vegetables that are easy to find and you can even sneak in some vegetables that your kids (and possibly husbands) might not eat otherwise. I typically make mine with carrots, sweet potatoes, sweet onions and beets. The kale added into the mixture towards the end of the cooking time adds a crispy, crunchy texture and a little more color.


Start by prepping your veggies. Peel the carrots, sweet potatoes, and beets. If you are using red beets, peel and chop those last since they will stain your prep area and the other vegetables. 


If your beets come with tops, trim them and place in a glass of water for up to 2 days. There are all sorts of dishes which you can use these beautiful beet greens. If you like to juice, throw some in while juicing; or chop the stems very finely and tear the leaves and mix into your favorite salad greens. Beet greens are also delicious sauted with a little olive oil and a splash of white wine vinegar. They even make a pretty "flower" arrangement for your windowsill. 


Once the vegetables have been washed and peeled you are now ready to chop into a 1/2 inch dice. 


Spread out onto a parchment lined, rimmed baking sheet. Drizzle with several tablespoons of olive oil, 1 teaspoon of salt and 1/2 teaspoon of fresh ground black pepper. Mix until all vegetables are coated evenly with the oil. Bake in a preheated 375 degree oven for 40 minutes, stirring once during cooking.


After 40 minutes, add the torn kale leaves on top of the roasting vegetables. Roast for 20 more minutes, then stir. Check your vegetable at this point, the beets and sweet potatoes should be fork tender, and the kale should be crispy. If not, roast for an additional 15-20 minutes. Remove from oven and serve as a side dish or over lentils or quinoa as a main dish.


Roasted Root Vegetables

Ingredients:
1 sweet onion, diced
1 medium sweet potato, diced into 1/2 inch cubes
3 large carrots, diced into 1/2 inch cubes
3-4 small beets, yellow or red, diced into 1/2 inch cubes
1 large bunch kale leaves, stems removed and torn into bite size pieces
3-4 Tbs. olive oil
1 tsp. sea salt
1/2 tsp. fresh ground black pepper

Preheat the over to 375 degrees. Line a rimmed baking sheet with parchment paper, place all vegetables, excluding the kale, on the baking sheet and drizzle with olive oil, Season with salt and pepper and mix until all vegetables are coated evenly.

Bake for 40 minutes, stirring once while cooking. Remove baking sheet from oven and pile the kale on top of the roasted vegetables. Return to the oven for 20 more minutes. Stir and check if vegetables are fork tender and kale is crispy. If not, return to oven and cook for an additional 15-20 minutes. Remove from oven and serve as a side dish or over lentils or quinoa as a main dish.


Sunday, January 29, 2017

Apple Fennel Slaw


Apple and fennel are a match made in heaven. My Apple Fennel Slaw is sweet, crisp and slightly tart and has only 5 ingredients. The produce selection during the winter months can be quite heavy with can leave you feeling loaded down and weighty. Apples and fennel are in peak season right now and they are light and refreshing on the palate.


Start by slicing the fennel bulb in very thin slices. I find it easiest to cut the fennel in half through the center, remove the core and then cut into quarters. Then slice each quarter very thinly. This will result in nice bite-sized pieces.


Cut the apple into matchsticks or julienne pieces. A quick way to do this is to cut the apple into thin slices, stack the slices and cut once more into thin matchsticks. Mix the apple and fennel together, add red wine vinegar, salt and a small drizzle of olive oil and serve. The slaw's flavors will begin to fuse together the longer it sits so it's even better a few hours later which makes it a great "make ahead" side dish. This slaw is also great with BBQ ribs or on top of pulled pork sandwiches.

Apple Fennel Slaw
Ingredients:
1 large honey crisp apple, julienned
1 bulb fennel. very thinly sliced
1 1/2 Tbs. red wine vinegar
1 Tbs. olive oil
pinch of salt

Combine apple and fennel in a large salad bowl. In a small bowl, mix together vinegar and olive oil with a pinch of salt. Mix until salt is dissolved. Pour over apples and fennel and toss to coat evenly. Can be made up to 1 day ahead and stored in the fridge in an airtight container.

Saturday, January 28, 2017

Homestyle Baked Beans


These Homestyle Baked Beans pair perfectly with my BBQ Ribs and they cook in the oven with the ribs making your life so much easier. I typically use canned beans for this recipe because I almost always forget to soak my beans overnight, and let's be honest opening up a can is so much easier. This recipe couldn't be any easier, it's just pouring all of the ingredients into an ovenproof pot like a Le Creuset or Staub, mixing and letting the oven work it's magic. This can even be made in a slow cooker, cooked on low for 3-4 hours.


The base flavors for these beans are some of my favorite - BACON and onions. Everything tastes better with bacon, right? 

Homestyle Baked Beans
Ingredients:
3 (15 ounce) cans of cannellini beans, drained and rinsed
1 sweet onion, diced
4 slices bacon (4 ounces), cut into lardons
2 Tbs. dark molasses
1/4 cup ketchup
1 Tbs. tomato paste
3 Tbs. brown sugar
1 cup chicken stock

Preheat oven to 275 degrees. Place all ingredients into an ovenproof enameled cast iron pot. Stir thoroughly to combine and season with salt and pepper. Cover with tight fitting lid and bake for 2 hours, stirring every 30 minutes. If the beans become too thick while cooking, add more chicken stock a 1/4 cup at a time until desired consistency is reached. 

Serve with BBQ Ribs or your favorite hamburgers or grilled dish. 

Friday, January 27, 2017

Weekend BBQ Ribs


Weekend meals in our house are easy and usually slow cooked, something that can be put together
quickly, placed in the oven (or slow cooker) and forgotten about until dinner time. These BBQ ribs are a family favorite and, depending on the number of racks you make, they can even be a great main dish for a Super Bowl party. They can be made ahead and left to rest in a warm oven until game time so you don't miss any of the commercials, I mean the big game.

These BBQ Ribs are super easy and they do not require any special equipment like a meat smoker. They are baked in an oven at a super low temperature for several hours so they come out very tender and juicy. My special rub adds tons of flavor, spice and a little sweetness.
First combine all the rub ingredients in a small bowl. The spice rub recipe makes enough for 2 racks of ribs. If only making one rack, divide the rub in half and store in an airtight container for up to 2 months in the fridge.


Rub ribs liberally with the spice mixture. Next, pour a few splashes of liquid smoke onto the ribs and massage into the rack until it is completely covered with a slightly damp spice mixture.

Cover pan tightly with foil and bake in a preheated 275 degree oven for 4-6 hours. If you like your ribs falling off the bone, cook for about 6 hours. If you like them a little "toothsome" and sticking to the bone, cook for only 4 hours.


When the ribs are done, remove the foil and preheat the broiler to high. Brush the meaty side of the ribs liberally with your favorite barbecue sauce.


Place pan on top rack of oven a broil on high for 3-5 minutes or until the barbecue sauce starts to brown and bubble. Be careful not to burn the sauce, it happens very quickly so don't walk away from the oven.  

Remove ribs from oven and let cool slightly before cutting between the rib bones. Enjoy with Homemade Baked Beans and a fresh Apple Fennel Slaw 

Weekend BBQ Ribs
Ingredients:
2 racks pork baby back ribs or country style ribs
Spice rub ingredients:
2 tsp. sea salt
1 1/2 tsp. black pepper
2 tsp. smoked paprika (Pimenton) , sweet or hot
1 tsp. garlic granules
1/4 tsp. cayenne pepper
1 tsp. dry mustard powder
1/4 cup dark brown sugar, lightly packed

1-2 Tbs. liquid smoke (hickory or pecan flavor)
1/4 cup favorite barbecue sauce, plus more for serving

Preheat oven to 275 degrees. Line a large rimmed baking sheet with foil and set aside. Rinse and pat dry racks of ribs and place on baking sheet. 

In a small bowl mix all spice rub ingredients together. Massage all over ribs while adding a few dashes of liquid smoke to the ribs creating a wet paste. Cover pan tightly with foil and bake for 4-6 hours. For "fall off the bone" ribs, cook for the longer amount of time. 

Remove ribs from over and uncover. Preheat the broiler to high. Meanwhile, brush ribs with barbecue sauce. Place under broiler on top rack of oven for 3-5 minutes, until the sauce is browned and bubbly. Remover from over, let cool slightly before slicing between the bones. Serve with additional barbecue sauce. 

Tuesday, January 24, 2017

DIY Window Boxes


I've been working on a little something that has taken me out of the kitchen and into my "workshop." My workshop is nothing fancy, just a storage shed full of the kids bikes, scooters and toys. When I manage to haul all of their junk out, I can do a little woodworking. Springtime is just around the corner, well here in Texas it's 80 degrees already and it's only mid-January, and that has me wanting to do some gardening. Our front porch was in desperate need of some sprucing up and some inviting color so I wanted some flower boxes.

After months of looking online and in stores for flower boxes that I could hang from my front porch railing, I couldn't find what I wanted, so I decided to make my own. The pre-made options just didn't have what I was looking for, they were either too small or way too expensive. I found a great tutorial on building your own here and made my own adjustments for length and a very simple trim. The materials only cost $75 and that's for 2 very large flower boxes.

Here's what lumber you will need to make two 4 foot long and 8 inch wide window boxes:
1 - 1 x 6 @ 8 feet long
2 - 1 x 8 @ 10 feet long
6 - 1 x 2 @ 8 feet long or other trim/molding
exterior wood screws like decking screws (1 5/8 inches)
wood glue
trim nails or finishing brads
hammer
miter box and hand saw or power saw
Carpenter's square
drill
1/2 inch drill bit
wood filler
putty knife
sandpaper
1/2 plastic tubing
Primer
Paint
Heavy duty plastic sheeting (4 mil or thicker)
Staple gun and staples
6 universal railing brackets

To start, cut the 1 x 6 x 8ft in half so you have two 4 foot sections, set one aside for the second window box. Next take the 1 x 8 x 10ft. and cut two pieces at 5 1/2 inches and two pieces at 49 1/2 inches. You should now have the main pieces of the box cut. Fit pieces together and using the deck screws assemble the box.

Using the 1 x 2 x 8ft fit the trim around the front 3 sides of the box. Cut each trim piece to fit and at a 45 degree angle so the corners will look professional and square. For more information on how to do this, go to the tutorial here. Attach trim to top edge and bottom of edge of box with finishing nails and wood glue. Add wood filler to any cracks or nail holes, sand smooth when dry.

To the right is a close up of the trim. I chose a very simple and clean trim, however, ornate baseboard and quarter round make a beautiful trim.

The nail holes have been covered with wood filler and sanded smooth. When ready to paint, vacuum the box and wipe down with a damp cloth to remove all dust.

Using the drill and 1/2 inch drill bit, drill 5 holes in the base of the box for drainage. Prime and paint your box. Alternatively, an outdoor wood stain and an outdoor polyurethane would look great for a more rustic look.

Measure out the plastic sheeting to hang over the edges of the box so there will be enough sheeting to fold over and staple once down inside the trough of the box. 

Line the inside of the box with the plastic sheeting, leaving a small amount at the top to fold over. 
Fold the edge over and staple into place. Take your time and check that the sheeting is flat along the sides, corner and bottom of the trough so when it is filled with dirt it does not rip the plastic sheeting at the staples. Take extra care on the short edges and trim any excess plastic so it folds nicely, if necessary. 

Get the tubing and serrated knife ready to push through the drainage holes in the bottom of the box.

Make a small hole in the plastic sheeting at the first hole with your knife, Then push the tubing from the inside of the box through the hole until it is flush with the outside/bottom of the box. Trim the excess tubing with the knife. Only put tubing in 3 of the 5 drainage holes, allowing any moisture to drain if water gets underneath the plastic lining. 


Fill with potting soil and your favorite flowers taking care to plant what will grow in your space. My porch is very shady so I can only grow plants that love low light, but if you are lucky to have full sun the options are endless. Try planting a few tall flowers like these Calla Lilies to add height and some shorter flowering plants like Primrose to fill in the spaces. Also, leave room for growth most of the plants at the nurseries are still in a very immature state and will grow substantially over the season.


Monday, January 23, 2017

10 Minute Seared Ahi Tuna


Need a quick and delicious fish recipe? This Seared Ahi Tuna delivers on both. Crusted with sesame seeds and served with a wasabi lime sauce, it can't get much easier and better than that. My husband gets complete credit for this Seared Ahi Tuna. He came up with the fish recipe and I added a dipping sauce to accompany it.

Before you prep the fish, make sure everything else for the meal is finished, the sides and the dipping sauce. I am typically in charge of making the sides and dipping sauce while my husband makes the fish. Cooking is much more fun when you have a teammate in the kitchen.

Sesame Crusted Seared Ahi Tuna

Ingredients:
1 pound Ahi Tuna steak, cut into 4 ounce portions
3 Tbs. raw sesame seeds, white or black
salt and pepper, to taste
1 tsp. sesame oil
For the Sauce:
1 lime, zest and juiced
1 Tbs. Tamari or soy sauce
1 inch piece ginger, peeled and finely grated
1 tsp. wasabi paste, or more to taste

Directions:
Place all of the ingredients for the sauce in a small bowl and mix well. Transfer to a serving dish.

Preheat a non-stick skillet over medium high heat until very hot. Salt and pepper the tuna steaks. Place sesame seeds in a shallow dish or bowl and dip each side of the tuna portions into the sesame seeds. Press slightly to make sure the seeds stick. Pour sesame oil into hot skillet and immediately place fish in skillet to sear. Sear each side of the tuna for 2 minutes for rare and 3 minutes on each side for a medium rare tuna steak. Remove fish from skillet and place on a cutting board. Slice tuna into 1/2 inch slices and serve immediately with dipping sauce.

Tuesday, January 17, 2017

The Most Important Night of the Week: Date Night


Some of the best advice my husband and I received before we were married was to always make time for each other, alone, without kids, just the two of us. In the beginning, before our little monsters came along, every night was date night. We made special meals, we went out for fun outings, and we had conversations about who we wanted to be and what we wanted to become. It was easy then. Now, we have to plan for a babysitter, get dressed up, go out to eat and by the time we sit down to eat and glance at our watches we realize it's way past our bedtime and we are exhausted just from the journey to get to the restaurant.

We decided once the kids came along it was more work to go out to a fancy dinner and what we really craved was time with each other, it wasn't about where we went or what we wore any longer. I've been told by many successfully married couples who are approaching their 40th and 50th anniversaries that the hardest times on a marriage are the years between your 10th-20th anniversaries. This is when the kids are little, you play the role of chauffeur, shoe tier, bather, cook, laundress, and snot wiper. Let's face it, your life revolves around teaching these little creatures to take care of themselves and very little of you is left at the end of the day to give to your spouse. If you aren't careful in devoting "non-kid focused" time with your spouse you could find yourself with an empty nest and nothing left to talk about with each other.

This advice we received at the beginning of our relationship has stuck with us and we devote one night a week, usually Friday or Saturday night, to date night. We don't go out, we stay in. We feed the kids left overs in front of a movie (they love this and look forward to it almost more than we do). While the kids are watching their movie, the grown ups are having a glass of wine in the kitchen, cooking dinner together and decompressing. When dinner is ready, we put the kids to bed and eat a quiet dinner together. many nights we stay up way past our bedtime just talking about our lives. One rule we do have about date night is No Kid Talk. We don't discuss what the kids are doing, who they are friends with, their school activities, etc. We spend this night talking about ourselves, our lives, our dreams, us. So much of our days are already filled with what the kids are doing, this is our time to reconnect and remember why we started this crazy life together.

I encourage you to set aside a time with your significant other and reconnect. Put it on the calendar if you need to. Don't schedule anything else over it. Happy hour at work or a double date with friends can wait. Your kids will thank you when they are older that you took the time to not focus on them and focus on your relationship with your partner. I know I'm thankful my parents did, they are about to celebrate their 37th anniversary.

Here are a few books that I've enjoyed about marriages and parenting:
The 5 Love Languages: The Secret to Love That Lasts by Gary Chapman
Marriage Matters by Tony Evans
Scream-Free Parenting by Hal Edward Runkel


Ok, now to the recipe. These Clam Steamers are delicious and my favorite part is dipping the crusty bread in the broth. This meal is so quick once you've cleaned the clams, you can make it in 15 minutes; so put the kids to bed before you start this meal.


Littleneck clams can be very sandy so they require a little cleaning. If any clams are open, give them a squeeze and they should close back up tightly. If they don't close, throw them away, they are no longer alive. With a stiff vegetable brush, scrub the outside of each clam under running water and place in a large bowl. A colander set inside the bowl can make for easy clam removal later. 


Fill the bowl with very cold water (if it's a hot day, add some ice cubes) and let them soak for 30 minutes. Remove the clams from the water by scooping them out or pulling out the colander. Discard the water from the bowl and rinse out any sediment in the bottom. Return the clams to the bowl and fill with cold water and soak for another 30 minutes. This process may be repeated several times, the goal is to get clear, sediment-free water after soaking. I usually repeat the process for a total of 4 soakings. 


When the clams are clean, and the kids are in bed, melt 2 tablespoons of butter in a large stock pot. Saute the leeks and garlic until softened and transparent. 


Add the wine and vegetable stock (or water) to the pot. Bring to a full boil.


Add the drained littleneck clams and give it a good stir. Place a tight fitting lid on the pot and steam on medium heat for 10-12 minutes. Discard any clams do not open. 


Serve with a fresh, green salad, crusty bread and a crisp white wine. 

Clam Steamers
Ingredients:
3-4 pounds Littleneck clams, cleaned
2 Tbs. butter
1 large leek, light green and white parts only, diced
1 clove garlic, minced
1 cup dry white wine, Pinot Grigio or Sauvignon Blanc
1 cup vegetable stock or water
lemon wedges for serving
parsley chopped, for serving

In a large stock pot, melt butter over medium heat. Saute leeks and garlic until soft and transparent. Add wine and vegetable stock and bring to a full boil. Stir in cleaned clams and bring to a boil. Close lid and steam for 10-12 minutes. Discard any clams that do not open. Sprinkle with parsley and serve with lemon wedges and a crusty French bread. 

Thursday, January 12, 2017

Detox Green Juice


Already cheating on your new diet? I know I have. Shake Shack tasted great yesterday, but my body is craving something nutritious. Here's my detoxifying green juice recipe that actually tastes great (the kids love it, too, even my picky eater!). I will usually send a bottle of this juice with my husband to work for a great mid-morning energy boost since eating healthy at work can be very difficult. 

This juice is full of healthy greens like baby kale which is high in Vitamin A, Vitamin C and potassium. I try to use baby kale in my juices because it tends to be less "grassy" tasting and you get all the same health benefits of the larger varieties. 

My green juice also has lots of ginger which aids in digestion and absorption of nutrients in the intestines. If this is your first time juicing ginger use only a small thumb-size piece as it can overwhelm the juice and make it very spicy. If you are like me and love ginger, you can add even more than the recipe calls for. 

If you don't have a special juicer like the Omega juicer I use, you can easily use a blender and fine mesh strainer to strain out the larger pulp. Another cheaper alternative to a heavy, duty masticating juicer like the Omega is a centrifugal juicer, which like the name suggests spins the juice out of the fruits and vegetables. If you are new to juicing, try the blender technique first, but I guarantee you will be hooked and your body will be craving yummy, nutritious juice all the time. 

I love juicing and my body loves it too! When I drink this healthy, detoxifying juice I can feel my body soaking it up. I get a quick energy boost and cravings for sweets and junk food diminish. 

This recipe makes enough for 4 medium servings or 2 large servings and it stores in the fridge for 2-3 days. 

Detox Green Juice
Ingredients:
3 small cucumbers or 1 large English cucumber, diced
2 granny smith apples, diced
6 cups baby kale leaves, lightly packed
1 2-inch piece ginger
2 lemons, peeled

Process all ingredients through the juicer (or blend in a blender on high for 1 minute then strain through a fine mesh sieve). If using a juicer, save half an apple for the end to push all of the kale leaves through the grinder. 

Pour into a glasses and enjoy or store in a large pitcher in the fridge for up to 3 days.

Wednesday, January 11, 2017

Thai Chicken Soup


This is the perfect chicken soup for cold weather or to help get over a dreadful cold. Winters here in Texas can be brutal for your immune system because we can swing from 80 degrees to 30 degrees and back in a matter of a few days, so having this soup in your repertoire can help when someone in your family comes down with the sniffles.

Starting your soup with a bundle of aromatics like cilantro stems, scallions, fresh ginger, garlic and lemongrass make a wonderful base to build upon. I also like to use rice noodles in this soup to keep it gluten free but if you don't have those on hand, you can use buckwheat noodles (Udon noodles), Chinese egg noodles (Lo Mein noodles), or a few packs Ramen noodles without the seasoning packets.


Thai cuisine balances three contrasting flavors: sweet, sour and spice. This recipe uses carrot for a subtle sweetness, lime zest and lemon grass for sourness (if you can find kafir lime leaves use those instead of the lime zest), and ginger and sambal oelek for spiciness. 


Carrots and mushrooms are traditional additions to this soup but you can add any vegetable you like. 


Serve this soup alongside a plate of fresh herbs such as mint, Thai basil (can with substitute regular basil), cilantro leaves, and sliced scallions. Serve with lime wedges and chili paste (Sambal Oelek). 

Thai Chicken Soup
Ingredients:
1 whole chicken, skin removed
8 cups chicken broth
6 cups water
kitchen twine
1 2-inch piece ginger, peeled and sliced
4 scallions
1 bunch cilantro, stems and leaves separated
2 limes, zest and juice
3 garlic cloves, smashed
1 stalk lemongrass, cut in 3 inch pieces
8 oz. mushrooms, cremini, shitake or button, sliced
4 medium carrots, sliced
1 12 ounce package rice noodles
1 Tbs. fish sauce
salt, to taste
For serving: fresh basil, mint, lime wedges, sliced scallions, sambal oelek 

Directions: 

Clean chicken and remove skin. Using coarse salt, scrub the chicken to remove any impurities. Using kitchen twine, tie up cilantro stems and scallions into a bundle. In a very large stock pot, place chicken, broth, water, cilantro bundle, ginger, lemongrass, lime zest and garlic and bring to boil over medium high heat. Simmer on medium-low heat for 35-45 minutes or until chicken is completely cooked through, skimming any foam that rises to the surface while cooking.

Remove the chicken from the soup and let cool for 10-15 minutes before picking the meat off of the bones. While chicken is cooling, strain the broth with a fine mesh strainer to remove all of the herbs and aromatics. Return broth to a full boil and add the carrots,mushrooms and noodles. Boil of 3-4 minutes (or longer according to the cooking instructions on the noodle package). Add fish sauce, juice of 1 lime, and return chicken back to the soup and season with salt.

Ladle into bowls and serve with fresh herbs, lime wedges and chili paste.